How to Perform a Windows XP Clean Install
In this post We are going to tell you how to do Windows XP
clean installation. The procedure is simple and there are lots of pictures to
help you understand it and do it your own.
Ok let’s see now how
to do a Windows XP clean install. Clean means that the OS will be installed
from scratch and not as an upgrade from a previous OS.
Everything else is
just following a setup wizard.
Insert the Windows XP
install CD in the DVD/CD ROM.
In order to launch the Windows XP setup you have to set the
computer to boot from the Windows XP install CD. You have two choices to do
this.
The first, which
is more typical, is to enter in the BIOS and change the boot priority.
The second is to bring the boot menu which is showed by pressing an F-key during memory test. When the computer performs the memory test look down at your display and see which F-key brings the boot menu. Just select the CD-ROM option and you are good to go.
To enter the BIOS,
restart your computer and press the “del”
key during the memory test. When you are in, go to the “Advanced BIOS Features” and find the boot priority setting.
Set as first device the CD-ROM. Then go back, save and exit. Now when you start
up your computer, it will first look if there is a bootable CD or DVD and if
there is nothing on the drive it will continue booting from the HDD. The BIOS
environment will look like the following
picture.
Ok now we are ready to launch a Windows XP clean install. As
the computer finds the bootable medium in the DVD/CD ROM it will prompt you to
press any key to boot from the CD. Just press a key and wait for the Windows XP
installation to begin. What you will see next is showed in the following
picture.
In first seconds the setup gives you the choice to add third
party SCSI and RAID drivers. If you have created a RAID array then you have to
install these drivers from a floppy disk in order for your hard drive to be
detectable. These are advanced tips that we will cover in a later article.
Let’s continue to our normal Windows XP clean install for now.
After a while you will be prompted to accept the Eula and
continue. Next you will have to select a partition where the Windows will be
installed. Look at the next photo.
On this screen you can create, delete or format partitions.
If your hard drive is brand new then you may have to create the partitions and
then to format them prior selecting them to install Windows XP. You can do all
these through this screen. Create a Partition .
Now we are going to select a partition to perform a Windows
XP clean install.
The installation continues with copying the necessary files.
After this it will restart the computer and the installation will continue from
the hard drive and in a more beautiful interface. If you have changed the boot priority from
the BIOS, now you can enter again and revert it back as it was previously.
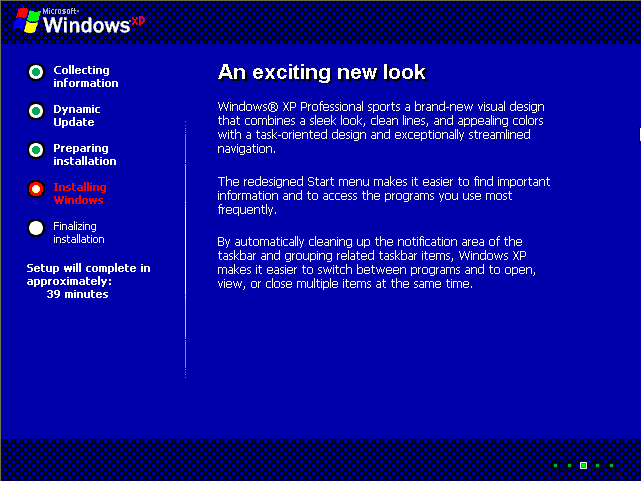
After the system restart you are going to see the next screen.
The installation continues and you just have to follow the
wizard. You will be prompted several times to select some regional, language
and user settings. We will see them all.
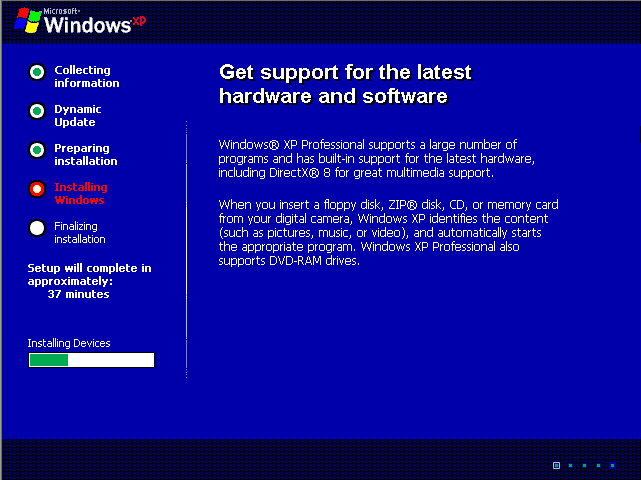
As you see there is a progress bar that show you when the
installation will be completed and the action that is currently performed.
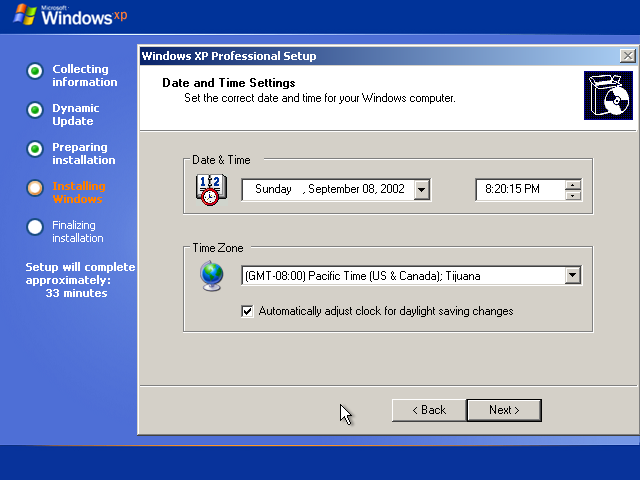
On the above menu you have to select the date and time and
also your time zone. Select the one that apply to your region and press next.
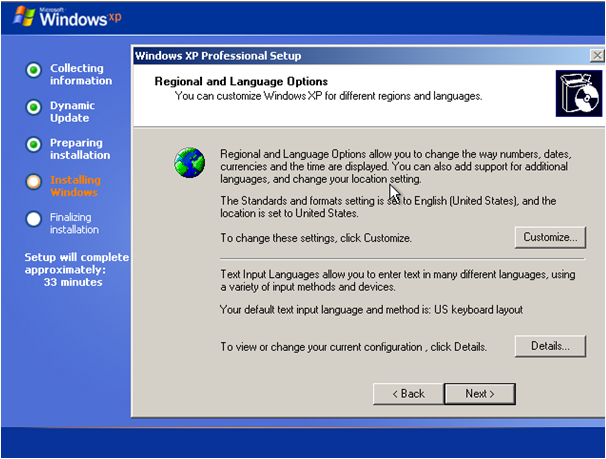
Now it’s time to enter some settings about your region and
language. Click on Customize to set your Current location and Language
settings. You will see the following tabs.
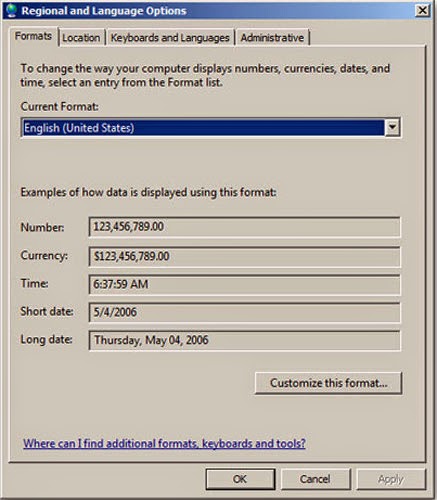
Select your Language and Location. Be careful, these settings are not for
selecting the Windows XP language. As clearly showed there “this option affects
how some programs format numbers, currencies, dates, and time”. Sochoose your
spoken language here. Don’t afraid if you select something wrong as all of
these settings can be changed later when the Windows XP clean install will have
been completed.
On the Location menu just select your country and hit OK.
Now if you want to install extra keyboard languages, click
on the Details on the previous Regional and Language Options form. This will
look like the following picture:
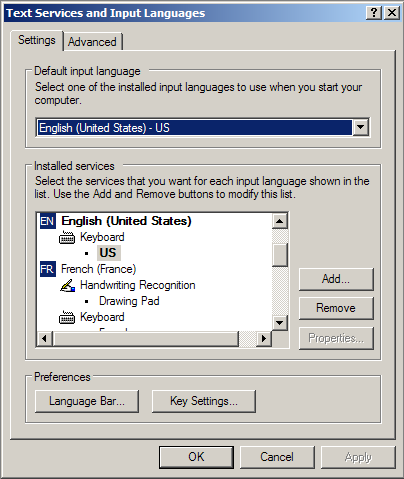
Select you default input language that will be used when you
start windows. Click Ok and then next to continue with the installation.
The next thing that you will be prompted is to enter user
details:
Simply enter your name here and press next. In the next form
enter a name for your computer. The computer’s name cannot be the same with
your name.
Enter an administrator password if you want. If you leave it
blank then Windows will not ask you for a password during logon. If the
computer is going to be used also from other people then it may be better to
set a password. But this is clearly your choice. Press next to continue
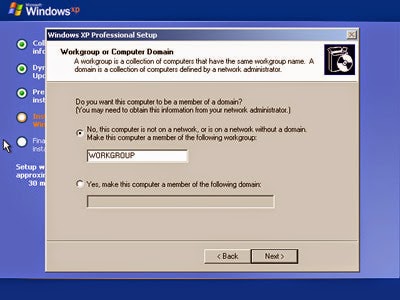
Some network options. What you see above are the defaults.
Unless your computer belongs to a corporate network you are not going to enter
something different here. Click next.
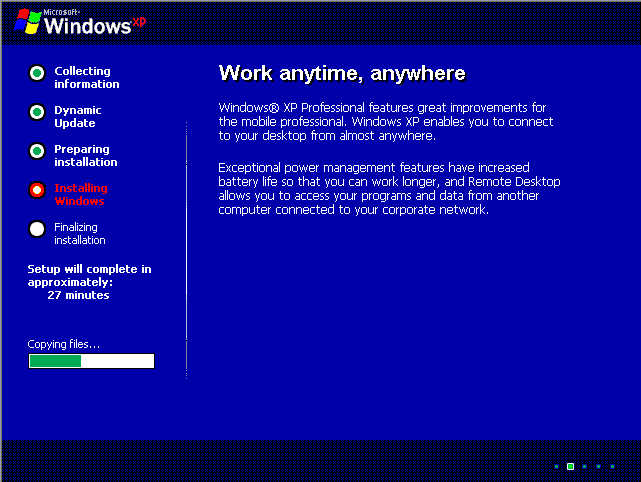
Now installation continues and you will not be prompted
again. A restart will follow and then Windows XP will start for the first time.
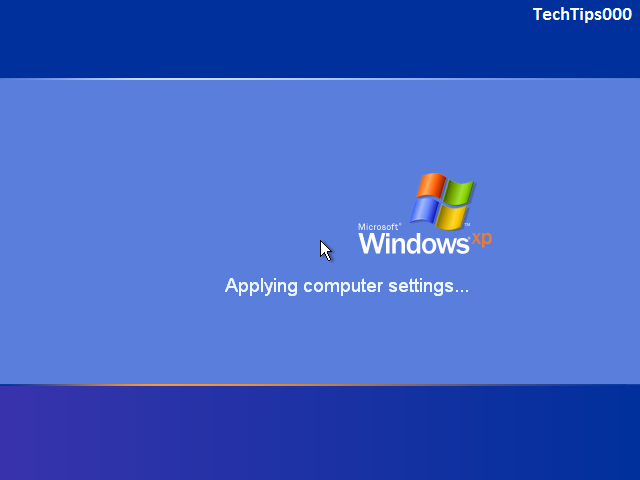
After the last restart you will see the above screen.
Windows XP operating system is preparing to run for the first time. You may
have to select some few options here but are all very easy to follow.
Congratulations you just performed a Windows XP clean
install! Now you are ready to use your new operating system. Did we say ready?
Ok you have to dosome extra work now like to install the drivers of your devices
but this is another chapter.
We hope that you found this guide easy. As you see there’s
nothing difficult to it. The installation is an easy and intuitive procedure
and does not require any special knowledge. Try it and see for yourself.
Windows XP Clean Install Summary
• Insert
Windows XP install CD into DVD/CD ROM
• Select
CD-ROM as the first boot device from the boot priority sequence in the BIOS or
from the boot menu.
• Start the
installation and select the partition that you want to install Windows XP.
• Enter the
details that the setup wizard will ask you during the installation.
• Wait till
the installation completes. That’s it! You just completed a Windows XP clean
install!




3 comments:
Thanks for this informative post.
ccna training institute in mumbai
Nice Blog Post !
Nice Blog Post !
Post a Comment